Installing a MyPiFi LCD onto a Raspberry Pi in a Pimoroni Pibow case
Having already done some work with LCD displays on the Arduino I had been looking for a project to use one with the Raspberry Pi. Wiring this up was a bit messy until the MyPiFi LCD display board came along. The problem I then had was that I couldn’t fit the MyPiFi LCD onto the Raspberry Pi when it was in a case and as a result the LCD was in a vulnerable position.
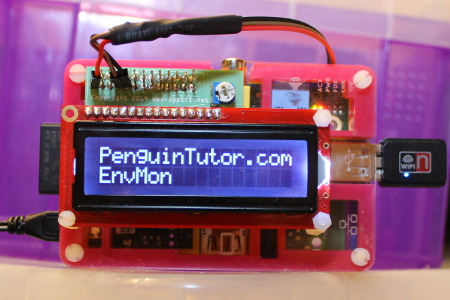
I decided to do some hacking on an existing case and this is what I came up with:
This is based on the original PiBow for the Raspberry Pi model B, although there is actually a Raspberry Pi model A inside the case.
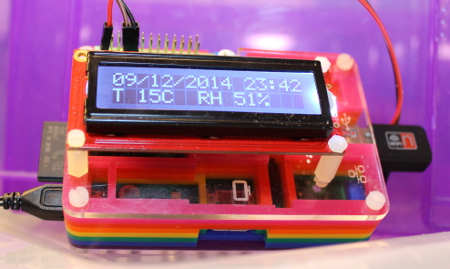
The LCD display is not the one I purchased with the MyPiFi LCD module. I originally purchased a 4×20 display which I decided was too big for this particular project. I therefore swapped it for a SparcFun 2×16 display – which is similar to the 2×16 display provided as part of the Kickstarter.
You can ignore the cables coming out of the top for now (all will be revealed about the mysterious sensor in due course). This is a Pimoroni Pibow Case with some alterations made to the top layer.
If you want to follow this yourself then you should be aware that this involves permanently damaging the top layer of the Pibow case. If you’d like to use the case for something else afterwards you can buy a replacement Pibow top layer from ModMyPi. Similar modifications can be made to the Pibow B+ case, but I believe that it should fit the B+ Pibow Coupe with less alterations (not tested).
The first thing is that there is no slot for the GPIO connector (there is for a cable, but not for a board to be mounted directly on top). The distance between the GPIO connector also meant that I needed to remove some of the top layer so that the PCB could mount where the top layer normally is. I therefore decided to saw off the corner of the top layer of the Pibow case to the same size as the MyPiFi LCD display. I did this by placing the MyPiFi LCD board onto the top layer and drawing around it then cutting with a small hacksaw. Then filed it down to make it a snug fit and smooth the edges.
With the PCB mounted the LCD display is still loose so needed to be secured with PCB mounts. I fitted the top layer and PCB on and marked holes to drill two holes to connect PCB mounts to hold the LCD display on the right hand side. I have also included a PCB stand on the bottom left, but it is not connected to the PiBow. I used M2.5 nylon screws and nuts to hold them in place.
More details of the sensor and software will be added in future.